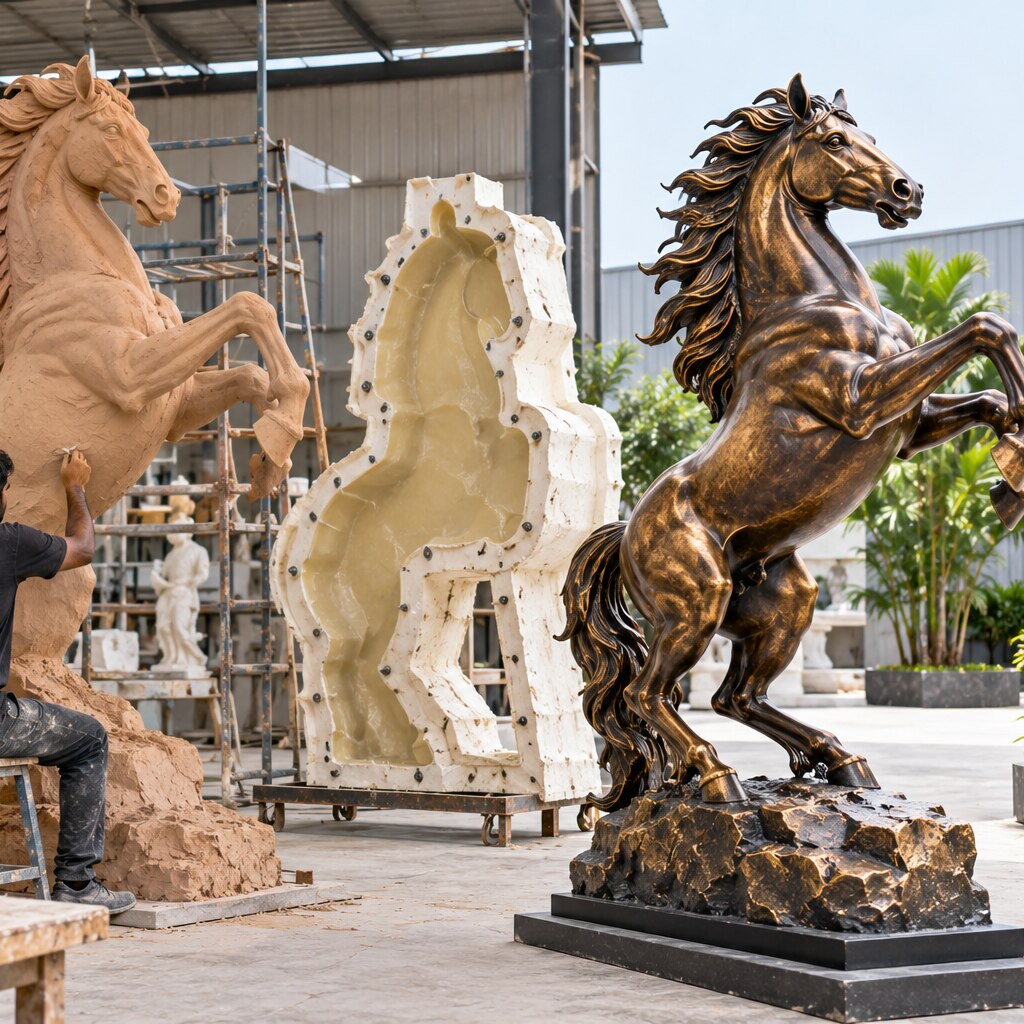
A sculpture moves through discovery, design, engineering, fabrication, transport, and site work before it becomes a finished landmark, figure, relief, or branded installation. By the end, you will know what information to provide, which drawings and approvals to request, how to compare materials, and how to check the work at handover.
Key takeaways
- Define the sculpture’s message, site conditions, scale, budget, and maintenance needs first.
- Test sightlines, pedestrian movement, lighting, and proportions before approving the final form.
- Keep concept sketches separate from structural drawings, fabrication files, and installation plans.
- Specify material grades, finish samples, transport splits, lifting points, and inspection access.
Start with the Story, Site, and Sculpture Brief
Before a line is drawn, decide what the sculpture must communicate, where it must stand, and what conditions it must survive. A sculpture brief turns those decisions into a working boundary; without one, a late change to the pose or silhouette can alter the armature, mould, transport split, foundation, and lighting plan.
1. Define the story and audience. State whether the subject is a founder, local landmark, logo, mascot, cultural idea, or architectural theme, and describe what viewers should understand within a few seconds. Reference gathering should include approved logos, photographs, motifs, proportions, colours, and examples that clarify what the sculpture must not copy.
2. Record the site. Measure the available footprint, height limits, viewing distances, sightlines, sun exposure, drainage, wind exposure, pedestrian movement, vehicle access, crane position, and nearby services. A tall or porous form can experience torsion and overturning, so its weight alone cannot determine the foundation or anchors.
3. Freeze the physical requirements in the sculpture brief. Specify overall dimensions, material build-up, joint locations, access panels, lifting points, anchorage, lighting, maintenance access, transport modules, and allowable visual tolerance. State whether the hidden frame carries wind, handling, signage, lighting, or touch loads while the skin remains non-structural.
4. Set the approval route. Use concept sketches and scale studies to approve the silhouette, proportions, finish direction, budget, schedule, and acceptable changes before detailed modelling begins. A small change is cheap here and disruptive after engineering starts.
Turn an Idea into a Form That Works at Its Location
A logo, mascot, story, or architectural theme becomes a workable sculpture by separating its essential visual message from its original flat or verbal form. Preserve the features people must recognise, then reshape them for depth, structure, lighting, and the conditions of the site.
- Gather reference images, brand rules, mascot poses, architectural details, and words that describe the intended feeling.
- Reduce the idea to a clear silhouette, dominant shapes, readable negative spaces, and one viewing priority.
- Test thumbnail sketches before developing 3D models; a form that works on paper can become confusing from the side or below.
- Use scale studies to check proportions, then assess viewing distance, sightlines, pedestrian circulation, shadows, and nearby obstructions.
- Obtain approval on the chosen form before freezing dimensions, joints, access panels, lifting points, anchorage, lighting, and maintenance access.
A full-scale appearance mock-up is especially valuable for an advertising sculpture. A small model confirms proportion but cannot reliably show whether letters look too thin, facial features disappear, negative spaces close up, welds remain visible, or surface texture creates unwanted shadows at installation distance.
Treat the approved appearance as one part of a larger system: foundation, anchors, primary frame, secondary frame, and skin. The structural frame carries wind, handling, signage, lighting, and touch loads; illuminated work also needs a separate electrical design for drivers, junction boxes, cable entries, connectors, and enclosure protection.
Separate Concept Design from Engineering and Production Documents
Client approval freezes appearance, not construction. After approval, issue a controlled concept package containing approved views, dimensions, scale studies, 3D modelling, material and finish references, colour, lighting intent, and silhouette. It defines what the sculpture should look like; it does not prove that it can stand, lift, travel, or be maintained.
| Document | Purpose | Must show |
|---|---|---|
| Concept package | Records client approval | Overall dimensions, proportions, finish, and allowable visual tolerance |
| Engineering package | Proves stability and load paths | Foundation, anchors, primary and secondary frames, skin, wind, dead, handling, and local loads |
| Fabrication drawings | Directs workshop construction | Sections, material thicknesses, joints, welds, fasteners, access panels, lifting points, and tolerances |
| Production files | Drives cutting, moulding, routing, or CNC work | Clean geometry, part numbers, nesting, tool paths, and revision status |
| Installation drawings | Directs site assembly | Module splits, reassembly keys, anchor locations, setting-out points, bracing, lifting sequence, and cable routes |
Treat the structure as a system: the hidden frame carries loads while the skin often provides appearance only. Wind pressure rises roughly with the square of wind velocity, so a tall, porous form can need stronger anchorage than a heavier, lower one.
Transport drawings must include centre of gravity, road-clearance limits, turning space, and lift points.
For an illuminated sculpture, issue a separate electrical design showing LED drivers, junction boxes, cable entries, connectors, isolation, and maintenance access. Match each enclosure and cable gland to its location’s ingress protection requirement; drilling or changing a gland can reduce the tested rating. Keep every file on one revision register before fabrication starts.
Choose Materials, Build the Structure, and Control the Finish
Choose the material against moisture, sunlight, impact, fire, weight, vandalism, and cleaning access—not appearance alone.
| Material | Best use | Main limitation |
|---|---|---|
| Clay | Master models and small indoor work | Softens, cracks, and needs sealing outdoors |
| Plaster | Moulds, studies, and sheltered interiors | Brittle and moisture-sensitive |
| Fibreglass | Lightweight outdoor skins | Needs a documented FRP and GRP laminate schedule |
| Resin | Detailed cast elements and indoor features | UV, heat, and fire performance depend on the formulation |
| Mild steel | Strong frames and painted outdoor forms | Rusts when coating or weld protection fails |
| Stainless steel | Exposed, high-maintenance-sensitive installations | Costs more and shows fingerprints |
| Aluminium | Lightweight panels and suspended forms | Lower stiffness and vulnerable to denting |
| Concrete | Heavy permanent outdoor monuments | Requires engineered foundations, joints, and curing |
| Wood | Warm interiors and protected exterior settings | Swells, splits, and needs recurring protection |
| Mixed media | Forms needing different textures or weights | Interfaces can crack, corrode, or move differently |
Treat the sculpture as a system: foundation, anchors, primary frame, secondary frame, and skin. Complete engineering calculations for dead load, wind load, lifting, handling, and touch or signage loads before fabrication. The skin is often non-structural; the frames carry the risk.
For FRP, record resin type, glass content, fibre direction, core, thickness, mould quality, and inspection points. Hand lay-up can create thin or resin-rich areas. Specify fire performance by tested system, not the phrase “fire retardant.”
Agree cleaning, inspection, repair access, and visual tolerance before choosing high-gloss paint, mirror metal, exposed concrete, or textured laminate. A finish that looks excellent at handover can become impractical in dust or heavy public contact.
Plan Transport, Installation, Inspection, and Long-Term Care
Between the workshop and final handover, the sculpture becomes a transport, structural, electrical, and maintenance project. Agree the transport split plan before fabrication so each module fits road limits, lifting equipment, turning space, reassembly keys, temporary bracing, and concealed joints.
1. Issue installation drawings showing module weights, centres of gravity, lift points, foundations and anchorage, setting-out points, joint details, cable routes, and maintenance access. A stable finished sculpture can still become dangerous when lifted if its centre of gravity moves beyond the lifting points.
2. Survey the base before delivery, then complete a dry assembly or trial fit. Confirm dimensions, anchor positions, crane or forklift access, and the condition of every module before applying sealant or permanent finishes.
3. Lift under a controlled method statement, use temporary bracing, inspect anchors, and seal joints after the structure is plumb and level. For illuminated work, verify lighting and electrical protection: check drivers, junction boxes, cable glands, connectors, drainage, and ingress protection as an installed assembly.
4. Handover only after checking rotation, joint visibility, lighting aim, cable protection, surface damage, and safe access for cleaning and inspection. Record photographs, anchor details, finish products, wiring routes, and recommended service intervals.
Choose a partner that can show coordinated drawings, lifting plans, site supervision, electrical competence, and a written maintenance schedule—not just attractive workshop samples. SHUBH AD'S Pvt Ltd can be considered when a project needs design coordination alongside visual fabrication and installation planning.
Agree cleaning methods before choosing high-gloss coatings, polished metal, exposed concrete, or textured FRP.
Related product
 | Product Details: Minimum Order Quantity 1 Piece End Use Website Preferable Date / Month Anytime Service Duration 4-5 days Type of Graphics 3D Type of... View product → |
Frequently asked questions
What should a sculpture brief include?
Record the intended message, audience, location, dimensions, viewing distances, budget, schedule, lighting, safety constraints, and maintenance requirements.
How do you make a sculpture work at its location?
Study sightlines, pedestrian movement, scale, shadows, lighting, access routes, surrounding architecture, and the surface or foundation where it will stand.
What is the difference between concept design and engineering documents?
Concept design establishes the visual idea, while engineering and production documents define structural loads, materials, joints, dimensions, fabrication methods, lifting points, and installation details.
How should sculpture materials and finishes be selected?
Choose materials for structural loads, weather exposure, corrosion risk, weight, repair access, and appearance, then approve finish samples before production.
What must be planned for sculpture installation and long-term care?
Confirm transport dimensions, lifting equipment, foundation readiness, assembly sequence, inspection checks, drainage, cleaning methods, recoating intervals, and access for repairs.